Pieface game: lego + arduino / esp8266

I am fascinated by videos of happy children that plays with pieface game. I have never had this, so i decided to build myself an adult-sized, low-budget version, based on ESP8266 board.


TODO: VIDEO OF MATCH

Rule of the game

Pieface is a 2 player game. Each player push a button repeatedly. The challenge push the button faster than the opponent. When the winner win, the looser received a pie in face.

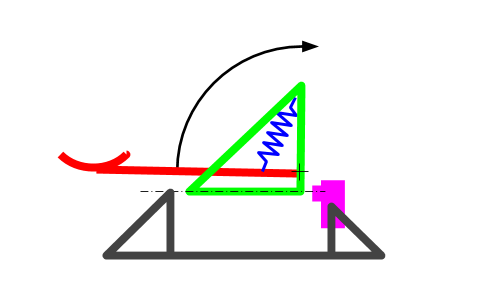
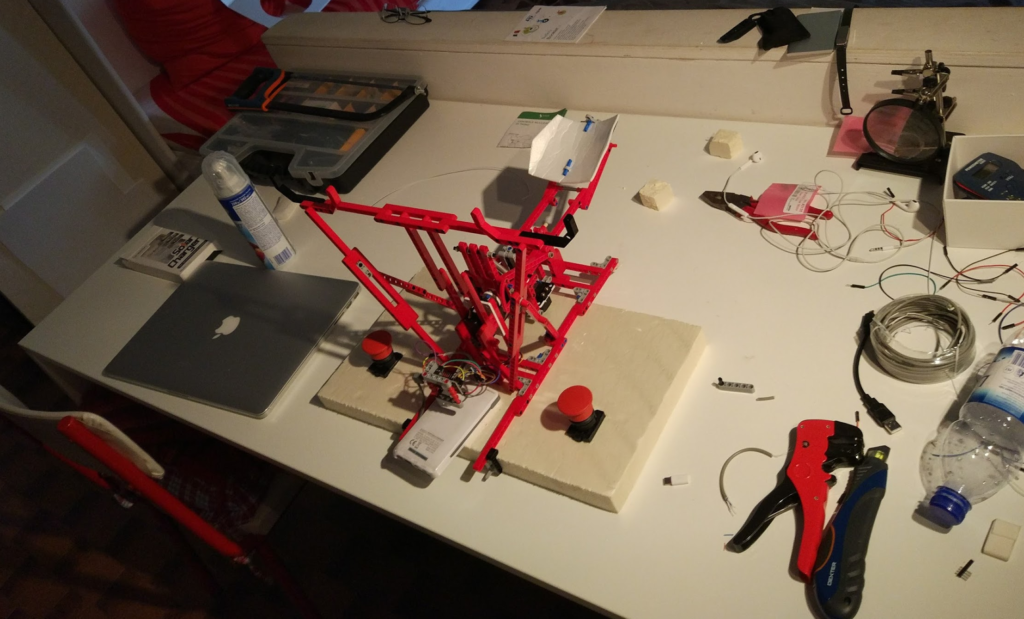
From a mechanical perspective the pieface game is basically an orientable catapult; the trigger is the difference number of button pressures.

Parts of System

  • 2 players
  • 2 buttons
  • 2 rc servos:
    • 1 direction rc servo
    • 1 unlock mechanism rc servo
  • 1 microcontroller
  • Springs
  • Lego technic beam
  • Spoon
  • Cream
  • Battery

Microcontroller

I choose a NodeMCU board (and Esp8266 powered board) because is cheap, Arduino compatibile and I already have one in my house. In this project I don’t use wifi, but with a wifi-ready board any upgrade in the wifi direction (i.e. tablet or website) is feasible.

Wiring

The wiring of the electronic part is minimal. The two buttons are connected on D4 and D5 (pull-up mode), the command pin of the two rc servos are connected D0 and D1.
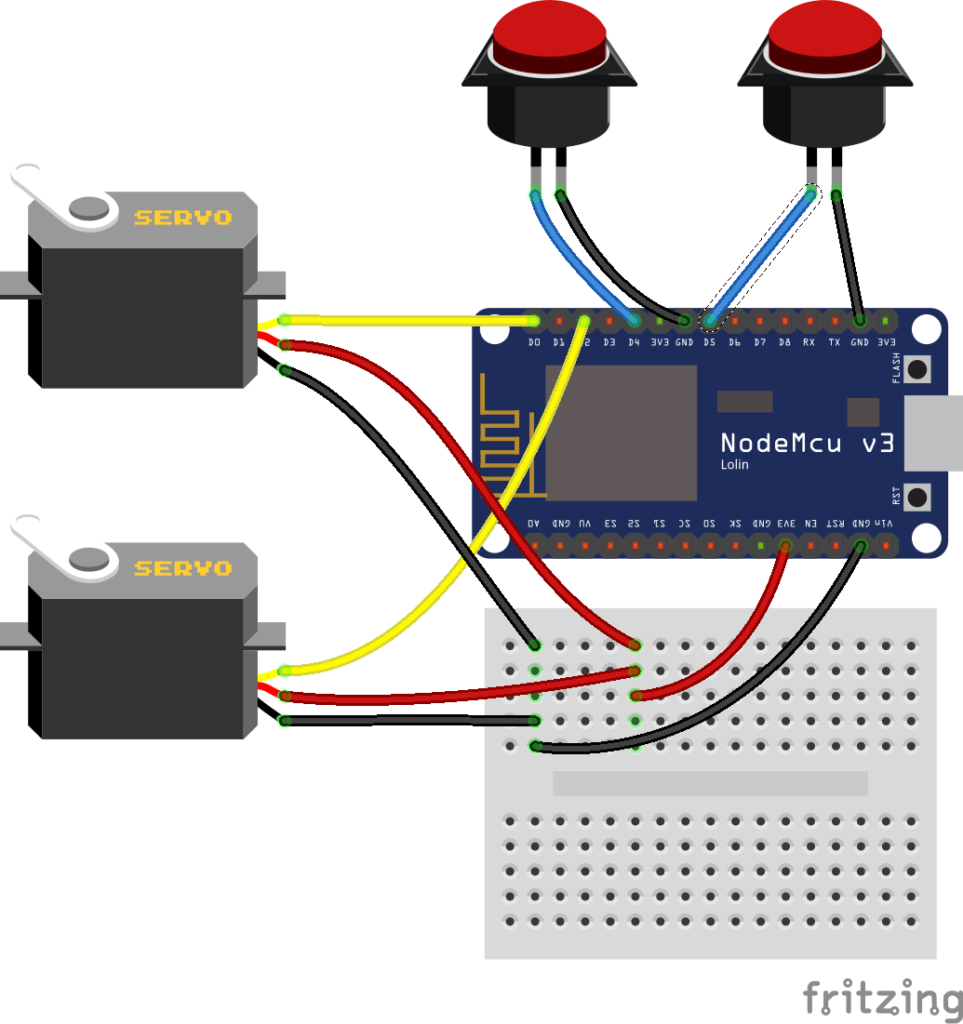
 Esp8266 pieface servo button


Software / Esp8266 code

The program on the Esp8266 count the delta between button press. This delta guide the direction rc servo (that orient the spoon on the face of one player or another). When the delta reach a limit, the second rc servo unlock the spoon pouring the cream on the loser.

// only loop method
// full code on https://github.com/albertosarullo/pieface-game-diy-arduino-esp8266
void loop() 
{ 
  int rightButtonValue = digitalRead(rightButtonPin);
  int leftButtonValue = digitalRead(leftButtonPin);
    
  if (rightButtonValue && !oldRightButtonValue) {
    delta = delta + 1;
  }
  if (leftButtonValue && !oldLeftButtonValue) {
    delta = delta - 1;
  }

  digitalWrite(LED_BUILTIN, !(leftButtonValue || rightButtonValue));

  // min: 55°, max: 125°
  servoPosition.write(90 + delta * 1.7);
  
  if (delta > limit || delta < -limit) {
     launch();
  } else {
     block();
  }

  oldRightButtonValue = rightButtonValue;
  oldLeftButtonValue  = leftButtonValue;
  
  delay(10);
}

For the complete source code visit https://github.com/albertosarullo/pieface-game-diy-arduino-esp8266

Physical Implementation

As is often the case in these projects, i choose an iterative approach: design, develop, test.

Iteration #1 – Exploration Sketch

At the beginning i made some sketch on paper to explore different hypothesis/solution and have an vague idea of the mechanical parts.

I made simple cardboard prototypes not in scale, simply to explore feasibility.

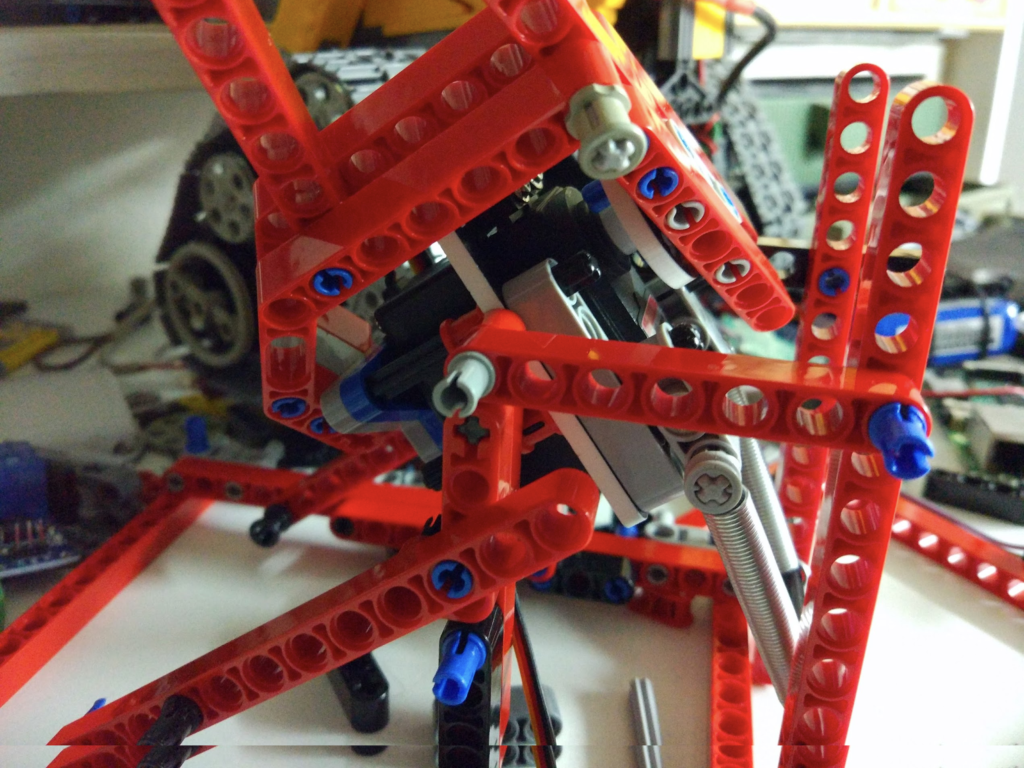
A crucial point is that  the structure is subject to a high force on launch time.

Iteration #2 – First Prototype

In this phase I use a PVC sheet for build the structure, but after the some trial I quickly change my plan, because basically I seemed to waste time cutting non reusable piece of plastic.

So I switch to Lego brick: they are more robust, modular, and guarantee rapid prototype speed.

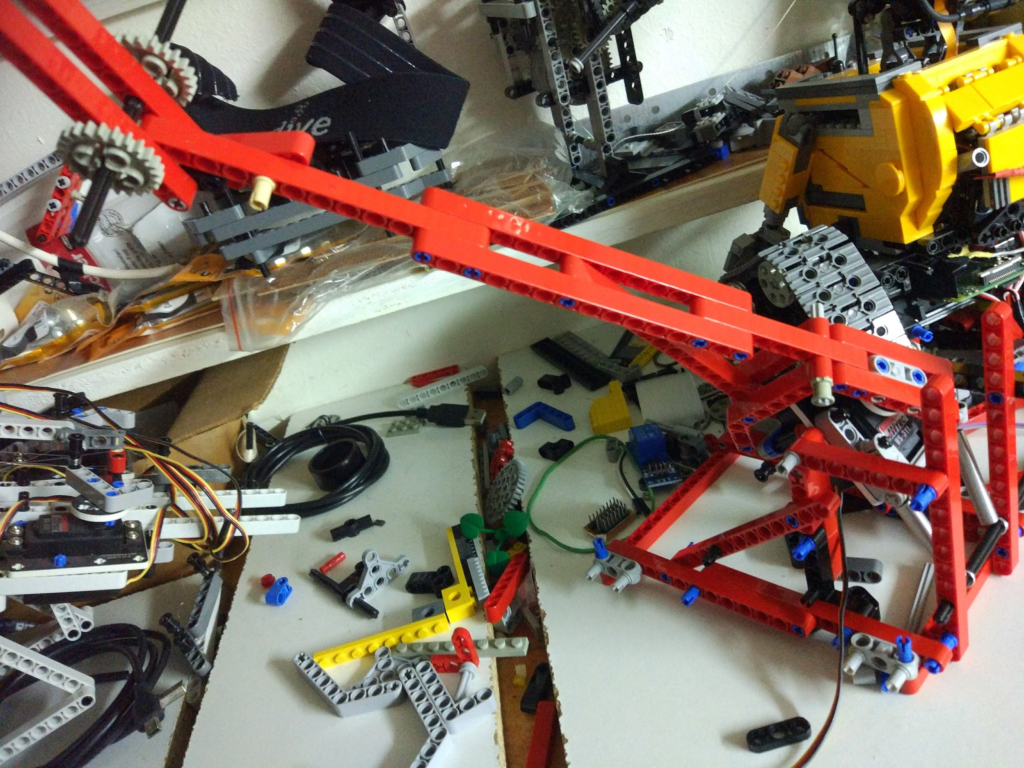
For the structure, I follow the Hasbro version: a horizontal pivot (spring powered), on which is mounted a vertical pivot (orientation rc servo).

Iteration #3 – Second Prototype

After some trial, i think that the structure need to be changed, because at launch time, all the springs force is discharged to the servomotor pivot.

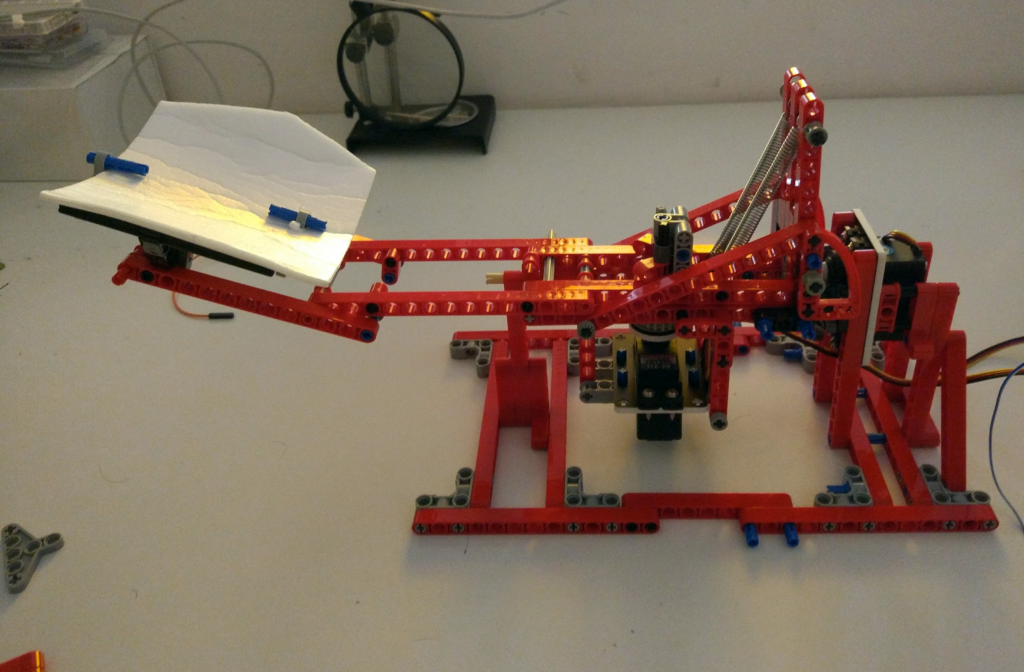
So I entirely destroy and rebuild the structure with this features:

  • The first pivot (orientation rc servo) is horizontal and rotate the spoon on left and right.
  • The second pivot (spring powered) is horizontal and launch the spoon
  • The spring can be regulated
  • The second servo control the launch mechanism

Iteration #4 – Extras

Now the system from functional perspective work, but need some extras:

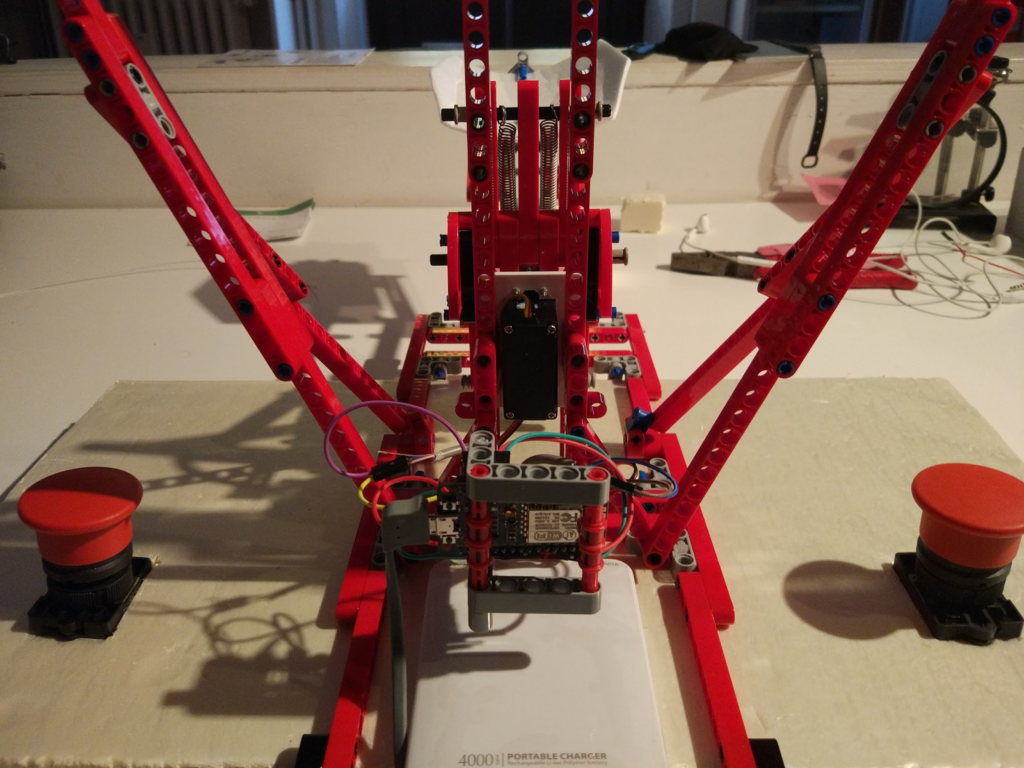
  • Mount all system on a polystyrene plan, to make solid and stable
  • Make some in house test for
    • Identifying the trajectory of cream and adjust some variable in code
    • Establish a reasonable delta between the button press (too small makes the matches too short, too long is not supportable for the forearms of the players)
  • Create a support for the player chin, so that the whipped cream hits the nose of the players
  • User test at my birthday

Future evolution

My personal challenge is make a mechanical only version, without any electrical parts (no battery dependency, waterproof).

Raspberry Pi Zero W: fast headless Wifi configuration with SSH

Yesterday I received a Raspberry Zero W, that for approximately $10 include Wifi and Bluetooth (byebye dongles) but no Ethernet port.

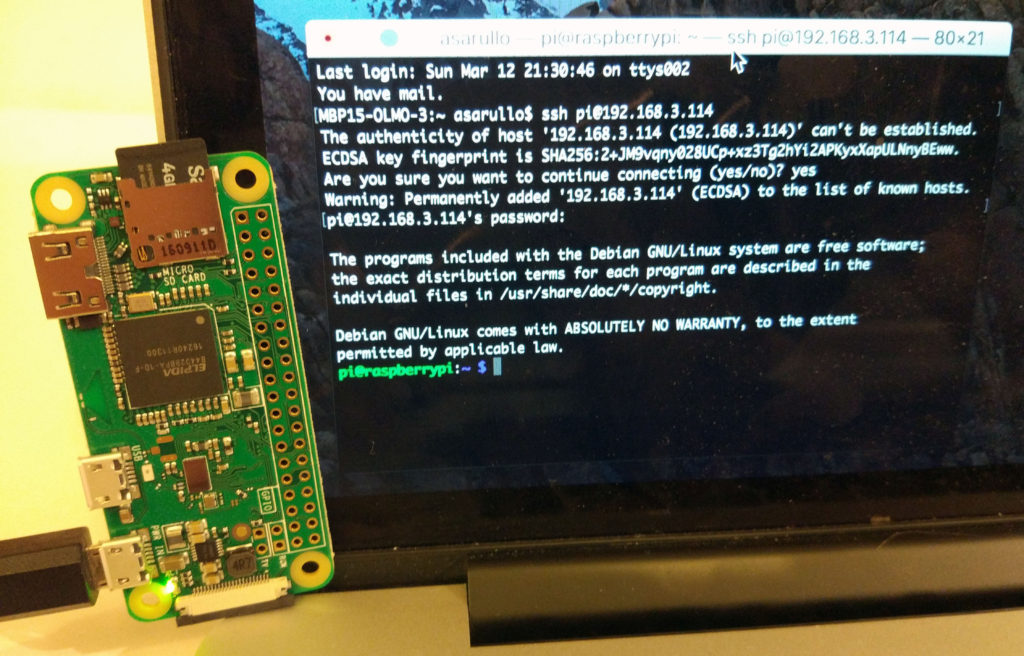
This post contains the instructions for configuring the Raspberry Pi Zero W so that he connects to the wifi network at the first startup of Linux, without wasting time (after that, you can log on via SSH).

  1. Download Jessie Lite image from the official repository (5 min)
  2. Download Etcher and burn the image on SD card (5 min)
  3. Insert the SD card in your notebook and open the boot folder of the SD Card
  4. Create an (empty) file called ssh (this enable SSH on startup)
  5. Create a wpa_supplicant.conf file with the following content
network={
    ssid="YOUR_WIFI_SSID"
    psk="YOUR_WIFI_PASSWORD"
    key_mgmt=WPA-PSK
}

Insert the SD in your Raspberry Pi Zero W, attach the power USB, connect your computer to the wifi, scan the network to find the raspberry IP address (i use lanscan on OSX) and you can connect via SSH (the default password is raspberry)

ssh pi@raspberrypi

ESP8266: Smartphone door opener for less then 10$

Sometimes you have your hands full of bags, umbrellas, etc. In these cases it would be useful to open the door without keys, simply finishing ahead.

My idea is to use a smartphone to trigger the opening of the door, using a microcontroller inside my house and an application on the cloud to manage the communications of the system.

For my jobs experience, I know very well that with a RaspberryPI + wifi (45$) or an Arduino Yùn (60$) the project is feasible, but:

  • my challenge is implement the whole system with a cost lower than 10$
  • It is a waste to use an entire operating system to push a button

So, I choose the well known ESP8266 module.

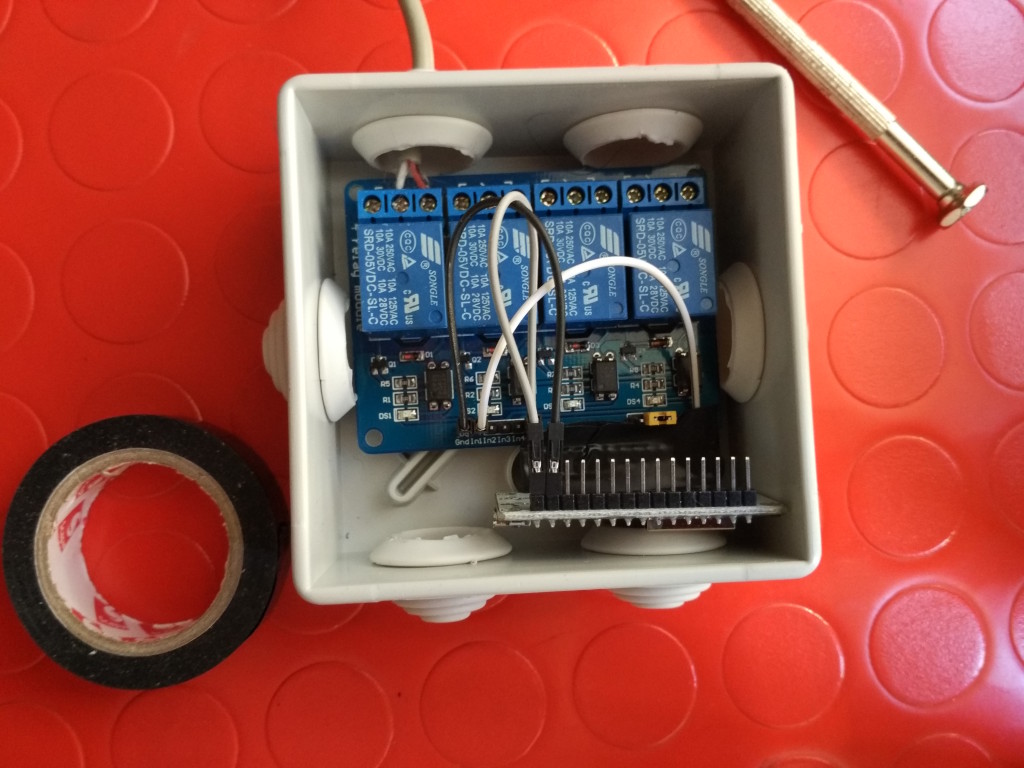
esp8266_relay_intercom_IMG_20160207_112909

Recipe

  • 1 ESP8266 dev board like NodeMCU (~8$)
  • 1 Relay (~1$)
  • NodeJS application on Azure websites  (0$)

I bought all the hardware on my favourite chinese mall Bangood.

System

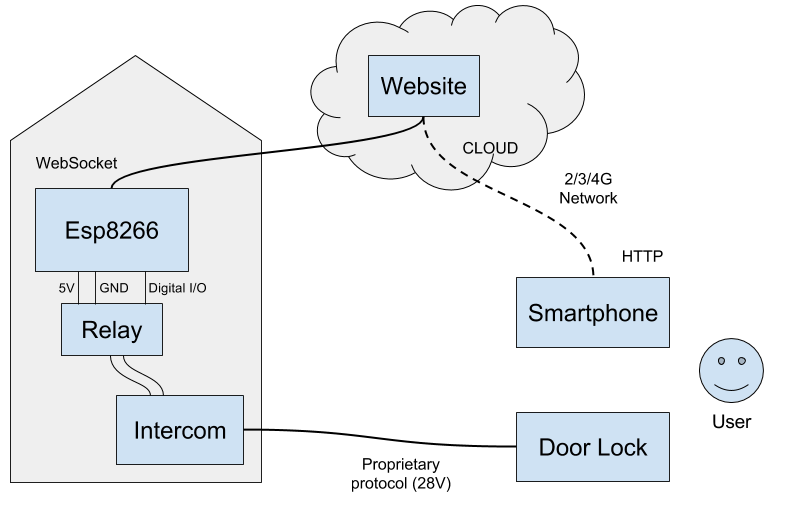
Intercom Esp8266 (2)

How it works

  1. On the cloud there is a NodeJS app (websocket server + http server)
  2. The ESP8266 board is connected to NodeJS app via websocket, using my home wifi network
  3. When certain conditions are met, the smartphone makes a HTTP request to NodeJS app
  4. When NodeJS app receive specific http request, send a command to the websocket
  5. The ESP8266 board receive the command instantly (< 0.2s) and activate the relay digital pin
  6. The Relay receive current and trigger the switch on the intercom
  7. The door is unlocked

Code

Soon publish the code on Github for both ESP8266 and NodeJS apps

TLTR

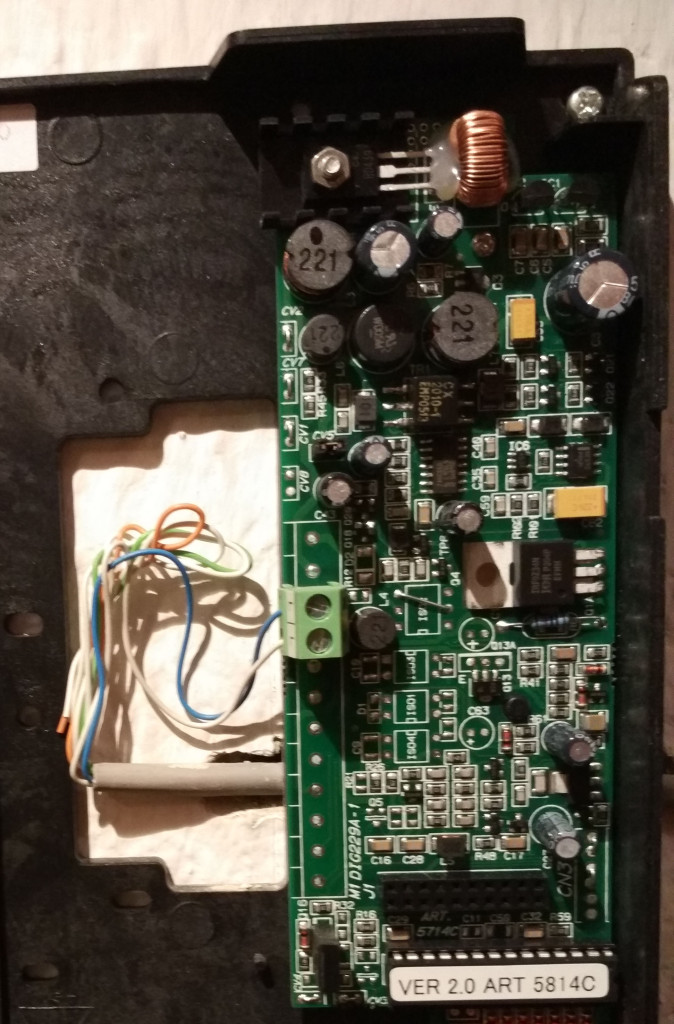
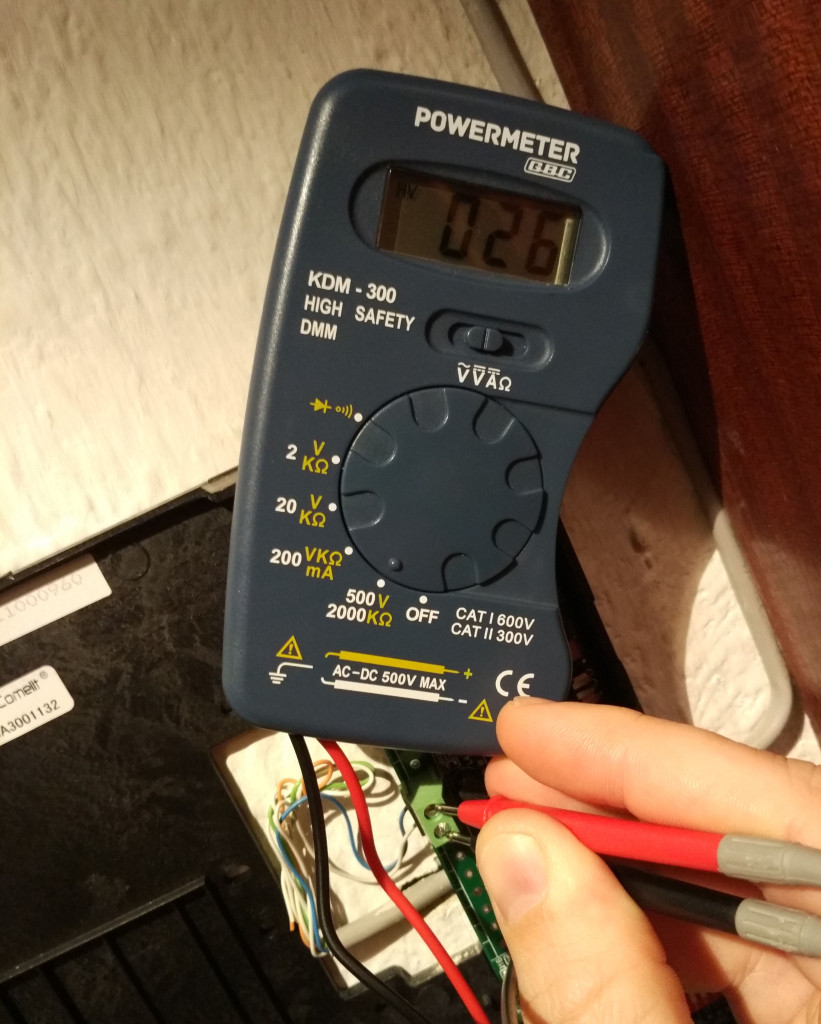
At the beginning I wanted bypass entirely the intercom, but after few attempt I realize that the intercom protocol is not well documented. Audio, video and signal all on 2 wire at 26-28V. Definitely easier to simulate the press on the intercom button using a relay.

IMG_20160204_193929 copy

IMG_20160205_210522

After write the Esp8266 code with Arduino, I wrote the server parte with NodeJS and a webpage.

From an architectural perspective the initial system is composed by a single server and two client (Esp8266 and Smartphone) that communicating with a persistent connection (websocket).

Due to the websocket connection limit of free azure websites (max 5 connection) an other economic considerations, I upgrade the system to limit the websocket connection only to the indispensable Esp8266 side, letting the smartphone using classic HTTP requests to send commands to the server.

I build a webpage with a on/off butto to test the system, and it works! After 2 weeks of continuous running without any problem, I am fully satisfied: I can open my door with a touch on my smartphone.

But it would be great if I could open the door without touching the smartphone. So I started to investigate the conditions and technologies to upgrade the system the next level.

As often happens, any simplification for the user adds layers of complexity to the system, and the variables become many:

  • location (gps and wifi based)
  • walk paths
  • hours of the day
  • days of the week
  • wifi ssid available
  • network to which my mobile phone is connected

The approach based on a web page was no longer sufficient: i switch to native app.

Oculus Rift handmade with Lego and google streetview

Recently I build an Oculus Rift like low cost alternative to simulate the original device.

I have a smartphone with hd screen and find on Amazon an interesting kit (2 lens, 1 strap). So, I build a lego structure to bring together this elements, and wrote a small ios app that show two view, one for eye.

The gyro and accelerometer sensor make possibile to track the head movement, so the last ingredient was to find an app that show multiple 3d view based on sensors.

I not find the app, so I wrote a small ios app that show 2 streeview frame, rotating the view point based on sensors. The result is simple and awfull 🙂

Lego plays Ruzzle: nxt & nodejs powered robot

Today I have uploaded a video ‘Lego plays Ruzzle‘ on Youtube, to show how my creation works.

I like to mix different technologies to create something innovative.

I love Lego, and recently discovered Ruzzle, a popular mobile game. So, I decided to mix Lego, Ruzzle, Javascript, bash and other pieces to create a super robot 🙂

lego-plays-ruzzle

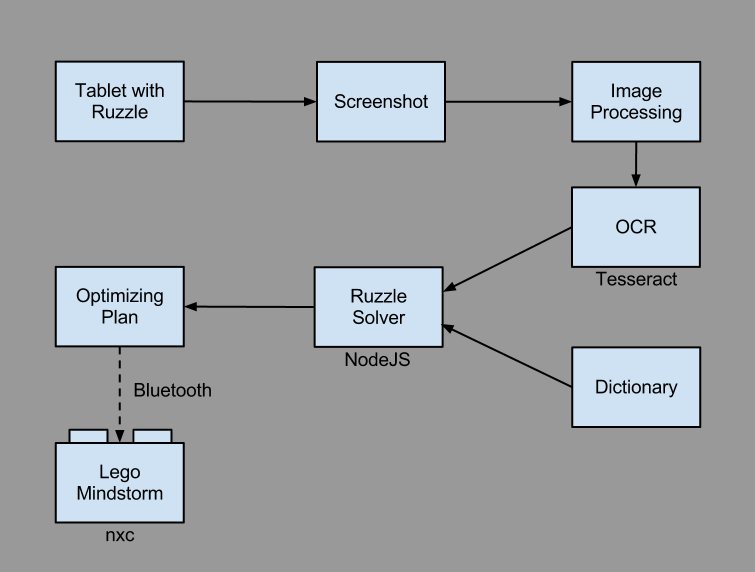
In this project I used:

  • Tablet with Ruzzle
  • Bash script for:
    • Bash script for download screenshot of device
    • Process image with Imagemagick
    • Recognize character from image with Tesseract
  • NodeJS for:
    • Solving Ruzzle
    • Optimizing the plan
    • Send via bluetooth to Lego Mindstorm
  • Nxc program to receive plan via bluetooth
  • Absolute Position Regulator library for precise control of lego motors

Ruzzle solver scheme (3)

The project is open source, and the code is on Github:

https://github.com/albertosarullo/ruzzle-mindstorm-nxc-nodejs-solver

More photos are on Flickr:

http://www.flickr.com/photos/silvana_g/8459161766/in/set-72157632723812787/

Other article on Lego Ruzzle Solver:

In march 23 I talked about history of my robots @ Codemotion Rome. Below you can finde the slides of my talk:


Any feedback / request is appreciated !


Ruzzle Lego Solver: first photo

After some day of building, conding, and testing, I publish the first photo of my Lego Ruzzle Solver.

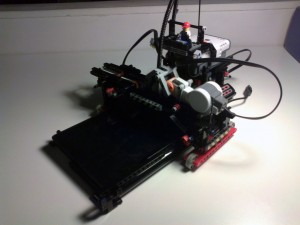
The robot use 3 NXT motors: one for x-axis movement, one for y-axis movement, and one for move the “finger” up and down. To decrease friction, the two movable parts of robot are supported on rigid wheels, like a bridge crane.

Ruzzle Lego Mindstorm Solver

A curious thing: the capacitive touchscreen of the tablet require human fingers (attached to human body) to dispatch touche event. Because attach fingers to lego mindstorm motor require detaching fingers from my body, I have discover that conductive sponge is a very good alternative, and because vegetal sponge is conductive, I have buy it at supermarket for 1 euro saving my real fingers.

Ruzzle Lego Mindstorm NodeJS Solver

Yesterday I start to build a new Lego Mindstorm project to solve Ruzzle, a popular iOS/Android game.

My goal is to merge both software (image processing, ocr, solver) and hardware (mechanics, servos, fake finger on a touchscreen) worlds, building a funny Lego robot.

On software side:

  • Bash script for download screenshot of device
  • ImageMagick to process screenshot image
  • Tesseract for character recognition
  • NodeJS for:
    • solving ruzzle game
    • send the plan to lego mindstorm nxt via bluetooth

On hardware side:

  • Lego Mindstorm (nxt)
  • Nxc program that receive plan via bluetooth
  • Absolute Position Regulator for precise control of servo

When I have something working, I post nxc program on Github:

  • https://github.com/albertosarullo/ruzzle-mindstorm-nxc-nodejs-solver